Bronze wall sconces are more than just light fixtures; they are statements of classic style and enduring quality. Their rich, warm patina and intricate designs can instantly elevate the ambiance of any room, adding a touch of sophistication and character. While professional installation is always an option, many homeowners find that installing bronze wall sconces themselves is a rewarding and cost-effective endeavor. This comprehensive guide will walk you through the essential DIY installation tips, ensuring a safe, successful, and beautiful outcome for your new statement pieces.
Understanding Your Bronze Sconces: More Than Just Pretty Metal
Before you even pick up a screwdriver, take the time to familiarize yourself with your chosen bronze sconces. Bronze, a durable alloy primarily composed of copper and tin, is known for its longevity and resistance to corrosion. However, the specific finish and design of your sconces will influence their installation process and care. Some common finishes include:
- Polished Bronze: Offers a bright, lustrous shine that can be maintained with regular polishing.
- Antique Bronze: Features a darker, aged look with subtle variations in tone.
- Oil-Rubbed Bronze: Mimics the look of aged bronze with a dark, rich finish that often highlights lighter undertones in crevices.
- Verdigris Bronze: Develops a natural green patina over time, adding a unique, aged character.
Understanding the type of bronze and finish will help you anticipate any special handling requirements during installation and for future maintenance. For instance, delicate finishes might require extra care to avoid scratching during mounting.
Essential Tools and Materials: Your DIY Toolkit
A well-equipped toolkit is the foundation of any successful DIY project. For installing bronze wall sconces, you’ll need:
- Screwdrivers: Both Phillips head and flathead screwdrivers will likely be necessary.
- Wire Strippers: For safely preparing electrical wires.
- Voltage Tester: Crucial for ensuring the power is off before you begin electrical work. A non-contact voltage tester is the safest option for DIYers.
- Drill and Drill Bits: For creating pilot holes in walls and mounting brackets.
- Level: To ensure your sconces are perfectly straight.
- Measuring Tape: For accurate placement.
- Pliers: For gripping and manipulating wires.
- Wire Connectors (Wire Nuts): To securely join electrical wires.
- Safety Glasses: To protect your eyes from dust and debris.
- Work Gloves: To protect your hands and prevent smudging the bronze finish.
- Mounting Hardware: Usually included with your sconces, but ensure you have the correct type for your wall material (e.g., drywall anchors if mounting directly to drywall).
- A Helper: While many sconces can be installed solo, a second pair of hands can be invaluable for holding the fixture in place while you make connections or secure it to the wall.
Step-by-Step Installation Guide: From Power Off to Illumination

Safety is paramount when working with electricity. Always remember to turn off the power to the circuit you’ll be working on at the main electrical panel before starting any installation. If you are unsure about any step or feel uncomfortable with the electrical aspects, do not hesitate to consult a qualified electrician.
1. Safety First: Cutting the Power
Locate your home’s electrical panel. Identify the circuit breaker that controls the power to the area where you will be installing the sconces. Flip the breaker to the “OFF” position. To double-check that the power is indeed off, use your voltage tester at the existing light fixture or junction box. Test all wires to confirm there is no electrical current.
2. Removing the Old Fixture (If Applicable)
If you are replacing an existing light fixture, carefully remove it. Typically, this involves unscrewing a decorative canopy or mounting screws that hold the fixture to the junction box. Once the fixture is detached, you will see the electrical wires connected to it. Carefully disconnect these wires by unscrewing the wire nuts. Note how the wires were connected (usually black to black, white to white, and green or bare copper to ground).
3. Preparing the Mounting Location
Your new bronze sconces will likely come with a mounting bracket. This bracket needs to be securely attached to the wall, usually to an electrical junction box. If there isn’t a junction box already present, you will need to install one. This is a critical step for safe and secure mounting. If you are mounting directly to a stud, pre-drill pilot holes. If mounting to drywall, use appropriate heavy-duty drywall anchors designed to support the weight of the sconce. Use your level to ensure the mounting bracket is perfectly horizontal.
4. Wiring the Sconces: The Heart of the Operation

This is where your wire strippers and wire connectors come into play. You’ll connect the wires from your sconce to the wires coming from the junction box. The standard color coding is:
- Black wire (hot): Connects to the black wire from the junction box.
- White wire (neutral): Connects to the white wire from the junction box.
- Green or bare copper wire (ground): Connects to the green or bare copper ground wire from the junction box, and often to a grounding screw on the mounting bracket itself.
Ensure the connections are tight and secure by twisting the wire nuts clockwise. Gently tug on the wires to confirm they are firmly attached. If your sconce has a separate ground wire, make sure it is properly connected for safety.
5. Mounting the Sconce

Once the wiring is complete, it’s time to attach the sconce itself. Carefully align the sconce with the mounting bracket and secure it according to the manufacturer’s instructions. This usually involves screwing the sconce directly to the bracket. Again, ensure it’s snug but avoid overtightening, which could damage the bronze finish.
6. Installing the Light Bulbs and Shade
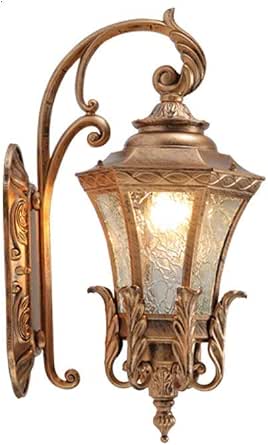
Before restoring power, install the recommended light bulbs for your sconces. Ensure you are using bulbs within the wattage limits specified by the manufacturer to prevent overheating. If your sconces have glass shades or decorative elements, carefully attach them now.
7. Restoring Power and Testing
Return to your electrical panel and flip the circuit breaker back to the “ON” position. Now, it’s time for the moment of truth! Flip the light switch. If everything has been connected correctly, your beautiful new bronze sconces should illuminate your space.
Troubleshooting Common Installation Issues

Even with careful planning, you might encounter a hiccup. Here are a few common issues and how to address them:
- Light doesn’t turn on:
- Double-check that the circuit breaker is fully in the “ON” position.
- Verify that the light bulbs are screwed in properly and are not burnt out.
- Re-check your wire connections to ensure they are secure and correctly matched.
- Sconce is loose:
- Ensure the mounting bracket is securely fastened to the junction box or wall.
- Check that the screws attaching the sconce to the bracket are tight.
- If mounted to drywall, verify that the anchors are holding firmly.
- Flickering light:
- This often indicates a loose wire connection. Turn off the power and re-inspect all connections.
- The issue could also be with the light bulb itself. Try a new bulb.
If you are unable to resolve the issue, or if you suspect a problem with the electrical wiring in your home, it’s always best to contact a qualified electrician.
Case Study: Elevating a Dining Room with Bronze Sconces
Consider the Smith family’s dining room. They wanted to create a more intimate and sophisticated atmosphere. After researching various lighting options, they decided on a pair of ornate bronze wall sconces to flank a large mirror. They opted for a DIY installation. They carefully followed the steps outlined above, taking extra care to align the sconces symmetrically. The result was dramatic. The warm glow of the bronze sconces cast a beautiful light on the dining table, creating a welcoming ambiance for family dinners and entertaining guests. The visual impact was significant, transforming the room from functional to fabulous, all achieved within a weekend and a fraction of the cost of professional installation.
Statistics and Insights: The DIY Advantage

The DIY home improvement market has seen consistent growth, with millions of homeowners taking on projects themselves. According to a report by Statista, the global DIY home improvement market was valued at over \$120 billion in 2020 and is projected to continue its upward trajectory. This trend is driven by a desire for cost savings, personalization, and the satisfaction of creating something with one’s own hands. Installing light fixtures like bronze sconces falls squarely within this popular DIY category, offering a tangible and aesthetically pleasing upgrade to a home.
Furthermore, the accessibility of information through online tutorials, blogs, and detailed product manuals empowers even novice DIYers to tackle more complex tasks. The key is thorough research, meticulous planning, and a commitment to safety.
Maintaining Your Bronze Sconces: Preserving Their Lustrous Appeal
Once installed, your bronze sconces will add beauty to your home for years to come. Regular maintenance will ensure they retain their original luster. For most bronze finishes, a soft, dry cloth is sufficient for dusting. For slightly more stubborn marks or to restore shine, you can use a mild, non-abrasive metal polish specifically designed for bronze. Always test any cleaning product in an inconspicuous area first. Avoid harsh chemicals or abrasive cleaners, as these can damage the delicate patina of the bronze.
Illuminating Your Home with Confidence
Installing bronze wall sconces as a DIY project is an achievable and highly rewarding undertaking. By understanding your fixtures, gathering the right tools, and meticulously following safety procedures and installation steps, you can confidently bring timeless elegance and warm illumination to your home. The satisfaction of a job well done, coupled with the enduring beauty of your new bronze sconces, will undoubtedly be a source of pride for years to come. Remember, if at any point you feel unsure, consulting a professional electrician is always the safest and wisest course of action.